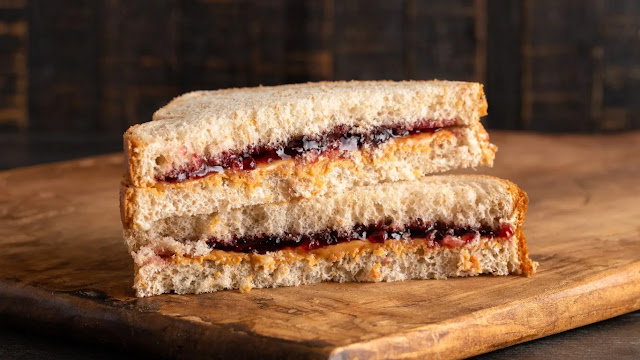
What child didn’t grow up eating peanut butter and jelly sandwiches? Who out there as an adult doesn’t still eat one on an occasional basis? Our family still enjoys these easy sandwiches. So, why not make them into a cake or cupcakes? They are sure to be crowd pleasers. When we did taste testing at our house for this recipe, the immediate reaction was “nailed it!”
This recipe is wonderful in many ways. Not only is it moist and flavorful, but it’s CUSTOMIZABLE! Do you want just a peanut butter cupcake? Great! Want to add jelly? Even better! What is your favorite jelly flavor……raspberry, strawberry, grape? They all taste amazing in the cupcakes and add a hidden WOW factor. So, have fun with this recipe, and try to make it different each time!
Here we go! First, as always a few special notes about some of the ingredients:
Creamy Peanut Butter. I know there are some chunky peanut butter fans out there, but this time it needs to be creamy. We all have our favorite brands, and know that the flavor will vary between the brands. So, pick your favorite brand, as that will decide the flavor of this cake.
Oil instead of butter. You will repeatedly see in my recipes that I use oil and not butter. That is just my preference. I find that oil makes a much more moist cake, and I do not like the texture that butter creates in cakes.
Brown Sugar. This will add more color, flavor and texture to the recipe. Make sure those chunks of brown sugar are broken apart and well incorporated.
Sour cream. This will add moisture to your cake without thinning out the batter. It also contains some extra fat to make your cake richer as well. Both good reasons!
Buttermilk. This will give the cake a nice body and great texture. To make a homemade buttermilk, as I often do, mix 1 Tbsp Vinegar and enough milk to make 1 Cup. Let sit for 5 minutes, and it will be ready to go.
Room temperature ingredients. Remember to get all of your refrigerated ingredients to room temperature prior to mixing to ensure they mix well and evenly! So important!
Let’s get started!
Instructions:
First, preheat your oven to 350 degrees. Also, prepare your cake pans or put your cupcake liners in place. I like to not only grease and flour my pans, but I also cut a piece of parchment paper to line the bottom of the pan so that the cake releases well.
Next, in a large bowl, whisk together the flour, baking powder, baking soda, and salt. Set this aside for later. Remember when you are measuring your flour to spoon it into the measuring cup, then level with the back of a knife. You never want to pack the flour down in the measuring cup, as this will lead to a much more dense cake.

In your stand mixer with the paddle attachment, mix the oil, peanut butter, eggs, brown sugar, sour cream, and vanilla on MEDIUM for two minutes.

Alternate adding the dry ingredients and buttermilk into the mixer, always starting and ending with the dry ingredients. Mix until just combined. Do not overmix!

Fill cupcake liners ONLY ⅔ full. Bake at 350 until a toothpick inserted in the center comes out clean. I typically start checking my cupcakes at 17 minutes and my cakes at 35 minutes. Cook times will vary based on your oven and how full you fill your cupcake liners or cake pans.
Allow cakes or cupcakes to cool for 10 minutes prior to removing them from the pan. Cool completely prior to frosting.
 To add jelly to the cupcakes you will need a special tip to put on your coupler/frosting bag. I use the Wilton Filling Tip 230 for this and it works beautifully. There is no need to remove the center part of the cupcake! Just fill a frosting bag with your favorite type of jelly, put tip 230 on your coupler and you are ready to fill your cupcakes. Insert the tip about ¾ inch into the center of the cupcake and gently squeeze the jelly into it. The jelly will naturally fill the air space in the center of the cupcake. How much you put in is up to you!
To add jelly to the center of a stacked cake, pipe a ring of frosting around the circumference of the lower cake layer to keep the jelly in place, and spread the jelly in the center. Place the second layer of cake over this and you have a nice surprise inside your cake!

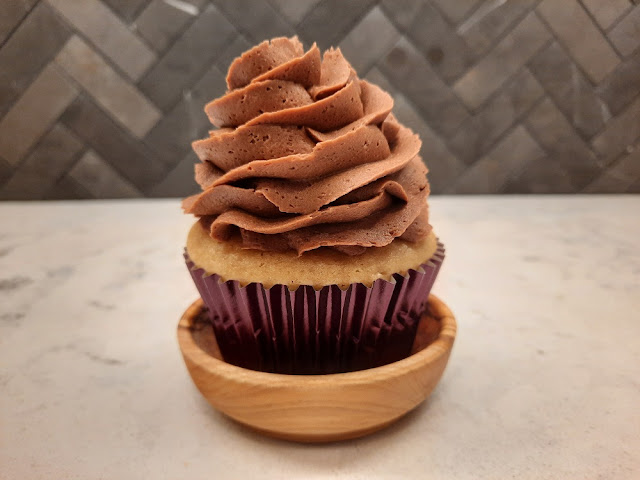
I like to pair this recipe with a Peanut Butter Chocolate Frosting, but a regular chocolate frosting would also be great.
2 sticks (1 Cup) unsalted or salted butter
⅓ Cup Creamy Peanut Butter
½ Cup Cocoa Powder
3 ½ Cups Powdered Sugar
3 Tbsp Milk
½ tsp Vanilla Extract
Cream butter in mixing bowl until fluffy - Approx. 2 minutes
Add powdered sugar, cocoa powder and milk
Beat on MED for 1 minute to combine
Add peanut butter and vanilla.
Beat additional 2 minutes until smooth.
ENJOY!


This recipe is wonderful in many ways. Not only is it moist and flavorful, but it’s CUSTOMIZABLE! Do you want just a peanut butter cupcake? Great! Want to add jelly? Even better! What is your favorite jelly flavor……raspberry, strawberry, grape? They all taste amazing in the cupcakes and add a hidden WOW factor. So, have fun with this recipe, and try to make it different each time!
Here we go! First, as always a few special notes about some of the ingredients:
Creamy Peanut Butter. I know there are some chunky peanut butter fans out there, but this time it needs to be creamy. We all have our favorite brands, and know that the flavor will vary between the brands. So, pick your favorite brand, as that will decide the flavor of this cake.
Oil instead of butter. You will repeatedly see in my recipes that I use oil and not butter. That is just my preference. I find that oil makes a much more moist cake, and I do not like the texture that butter creates in cakes.
Brown Sugar. This will add more color, flavor and texture to the recipe. Make sure those chunks of brown sugar are broken apart and well incorporated.
Sour cream. This will add moisture to your cake without thinning out the batter. It also contains some extra fat to make your cake richer as well. Both good reasons!
Buttermilk. This will give the cake a nice body and great texture. To make a homemade buttermilk, as I often do, mix 1 Tbsp Vinegar and enough milk to make 1 Cup. Let sit for 5 minutes, and it will be ready to go.
Room temperature ingredients. Remember to get all of your refrigerated ingredients to room temperature prior to mixing to ensure they mix well and evenly! So important!

Let’s get started!
Instructions:
First, preheat your oven to 350 degrees. Also, prepare your cake pans or put your cupcake liners in place. I like to not only grease and flour my pans, but I also cut a piece of parchment paper to line the bottom of the pan so that the cake releases well.
Next, in a large bowl, whisk together the flour, baking powder, baking soda, and salt. Set this aside for later. Remember when you are measuring your flour to spoon it into the measuring cup, then level with the back of a knife. You never want to pack the flour down in the measuring cup, as this will lead to a much more dense cake.

In your stand mixer with the paddle attachment, mix the oil, peanut butter, eggs, brown sugar, sour cream, and vanilla on MEDIUM for two minutes.

Alternate adding the dry ingredients and buttermilk into the mixer, always starting and ending with the dry ingredients. Mix until just combined. Do not overmix!

Fill cupcake liners ONLY ⅔ full. Bake at 350 until a toothpick inserted in the center comes out clean. I typically start checking my cupcakes at 17 minutes and my cakes at 35 minutes. Cook times will vary based on your oven and how full you fill your cupcake liners or cake pans.
Allow cakes or cupcakes to cool for 10 minutes prior to removing them from the pan. Cool completely prior to frosting.

To add jelly to the center of a stacked cake, pipe a ring of frosting around the circumference of the lower cake layer to keep the jelly in place, and spread the jelly in the center. Place the second layer of cake over this and you have a nice surprise inside your cake!

I like to pair this recipe with a Peanut Butter Chocolate Frosting, but a regular chocolate frosting would also be great.
Frosting Recipe:
Ingredients:
2 sticks (1 Cup) unsalted or salted butter
⅓ Cup Creamy Peanut Butter
½ Cup Cocoa Powder
3 ½ Cups Powdered Sugar
3 Tbsp Milk
½ tsp Vanilla Extract
Instructions:
Cream butter in mixing bowl until fluffy - Approx. 2 minutes
Add powdered sugar, cocoa powder and milk
Beat on MED for 1 minute to combine
Add peanut butter and vanilla.
Beat additional 2 minutes until smooth.
ENJOY!
Supplies used in making these cakes and cupcakes include: Measuring spoons, Measuring cups, Bowl set, Stand Mixer, Spatula set, Cake pans, Cake Boards, Cupcake pans, Cupcake liners, Ice Cream scooper, Parchment paper, Cooling racks, Frosting Bags, Tips, Ties and Caps, Cake leveler, Turntable, and Cupcake storage. Click here to be taken to my Amazon Cake and Cupcake Baking Supply List. For page transparency: As an Amazon Associate I earn from qualifying purchases.

See Full Recipe Below:

They sound delicious, especially with the jelly and the frosting!
ReplyDelete