If you are lucky, you wake up to the smell of coffee in your house in the morning. While I may not be a coffee drinker, I LOVE the smell of fresh brewed coffee. I also really enjoy any dessert that has espresso or mocha flavor in it. So, when my daughter wanted to try a new recipe for a school project, we thought it would be a great time to try out this Peppermint Mocha Cupcake recipe.

We looked at a number of published recipes online, made some adjustments to fit our preferences, and crossed our fingers when the cakes and cupcakes came out of the oven. The result was more than we could have asked for! This recipe is amazing. It is moist, flavorful, and great any time of the year.
Let's dive right in with a few special notes about some of the ingredients:

Baking Chocolate. Why do we need baking chocolate and cocoa powder? Why not? Honestly, this addition deepens the chocolate taste in this recipe, taking it to that next level.
Espresso Powder. My favorite ingredient in this recipe. By using this powder rather than fresh brewed coffee, the taste is that much better. Certainly not overwhelming, but just enough to make you say WOW!
Brown Sugar. We are using this in addition to granulated sugar. The brown sugar will deepen the color and the flavor of the recipe.
Pure Vanilla Extract. While I do use the clear imitation vanilla extract in some frosting recipes where I don’t want the extra color, it is very important to use Pure Vanilla Extract in this recipe to get the full flavor.
Oil instead of butter. You will repeatedly see in my recipes that I use oil and not butter. That is just my preference. I find that oil makes a much more moist cake, and I do not like the texture that butter creates in cakes.
Cocoa Powder. I’m a huge fan of Hershey’s, whether it’s the cocoa powder or just their chocolate in general.

Buttermilk. This will give the cake a nice body and great texture. To make a homemade buttermilk, as I often do, mix 1 Tbsp Vinegar and enough milk to make 1 Cup. Let sit for 5 minutes, and it will be ready to go.
Butter extract. As I use oil instead of butter in this recipe, we need to add back in that great buttery taste.
Peppermint extract. The espresso and peppermint in this recipe are the perfect pair. Make sure you are using PEPPERMINT extract, and not just MINT extract.
Room temperature ingredients. Remember to get all of your refrigerated ingredients to room temperature prior to mixing to ensure they mix well and evenly! So important!

Instructions:
First, preheat your oven to 350 degrees. Also, prepare your cake pans or place your cupcake liners in the pan. I like to not only grease and flour my pans, but I also cut a piece of parchment paper to line the bottom of the pan so that the cake releases well.
In a large bowl, whisk the flour, cocoa powder, baking soda, baking powder, and salt together. Set this aside. Remember when you are measuring your flour to spoon it into the measuring cup, then level with the back of a knife. You never want to pack the flour down in the measuring cup, as this will lead to a much more dense cake.

With your stand mixer and the whisk attachment, cream the oil, both sugars, eggs, vanilla extract, butter extract and peppermint extract on MEDIUM for two minutes.
Melt the baking chocolate in a small pot on the stove, stirring constantly. Once melted, pour into a small bowl. Mix in the espresso powder. Add this mixture to the stand mixer. It does not need to be cooled prior to adding.

Alternate adding the flour mix and the buttermilk mix. Always start and end with the dry ingredients. Mix until just combined.

Fill cupcake liners only slightly more than ½ full. Bake at 350 until a toothpick inserted in the center comes out clean. I typically start checking my cupcakes at 17 minutes and my cakes at 35 minutes. Cook times will vary based on your oven and how full you fill your cupcake liners or cake pans.
Allow cakes or cupcakes to cool for 10 minutes prior to removing them from the pan. Cool completely prior to frosting.

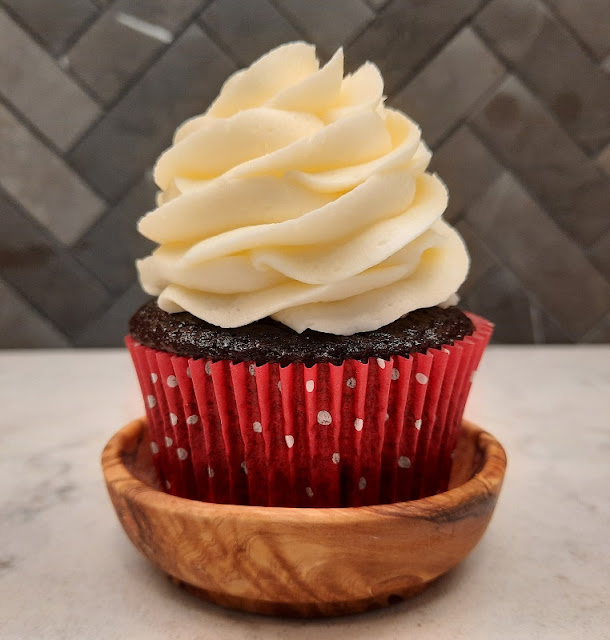
This cupcake pairs very well with Vanilla Buttercream Frosting, or make it exciting by reducing the amount of vanilla extract by ½ and adding in ½ Tbsp Peppermint extract. It also pairs well with Chocolate Buttercream Frosting…..there can never be too much chocolate! Sprinkle with peppermint bits or drizzle with melted baking chocolate.......


We looked at a number of published recipes online, made some adjustments to fit our preferences, and crossed our fingers when the cakes and cupcakes came out of the oven. The result was more than we could have asked for! This recipe is amazing. It is moist, flavorful, and great any time of the year.
Let's dive right in with a few special notes about some of the ingredients:

Baking Chocolate. Why do we need baking chocolate and cocoa powder? Why not? Honestly, this addition deepens the chocolate taste in this recipe, taking it to that next level.
Espresso Powder. My favorite ingredient in this recipe. By using this powder rather than fresh brewed coffee, the taste is that much better. Certainly not overwhelming, but just enough to make you say WOW!
Brown Sugar. We are using this in addition to granulated sugar. The brown sugar will deepen the color and the flavor of the recipe.
Pure Vanilla Extract. While I do use the clear imitation vanilla extract in some frosting recipes where I don’t want the extra color, it is very important to use Pure Vanilla Extract in this recipe to get the full flavor.
Oil instead of butter. You will repeatedly see in my recipes that I use oil and not butter. That is just my preference. I find that oil makes a much more moist cake, and I do not like the texture that butter creates in cakes.
Cocoa Powder. I’m a huge fan of Hershey’s, whether it’s the cocoa powder or just their chocolate in general.

Buttermilk. This will give the cake a nice body and great texture. To make a homemade buttermilk, as I often do, mix 1 Tbsp Vinegar and enough milk to make 1 Cup. Let sit for 5 minutes, and it will be ready to go.
Butter extract. As I use oil instead of butter in this recipe, we need to add back in that great buttery taste.
Peppermint extract. The espresso and peppermint in this recipe are the perfect pair. Make sure you are using PEPPERMINT extract, and not just MINT extract.
Room temperature ingredients. Remember to get all of your refrigerated ingredients to room temperature prior to mixing to ensure they mix well and evenly! So important!

Instructions:
First, preheat your oven to 350 degrees. Also, prepare your cake pans or place your cupcake liners in the pan. I like to not only grease and flour my pans, but I also cut a piece of parchment paper to line the bottom of the pan so that the cake releases well.
In a large bowl, whisk the flour, cocoa powder, baking soda, baking powder, and salt together. Set this aside. Remember when you are measuring your flour to spoon it into the measuring cup, then level with the back of a knife. You never want to pack the flour down in the measuring cup, as this will lead to a much more dense cake.

With your stand mixer and the whisk attachment, cream the oil, both sugars, eggs, vanilla extract, butter extract and peppermint extract on MEDIUM for two minutes.
Melt the baking chocolate in a small pot on the stove, stirring constantly. Once melted, pour into a small bowl. Mix in the espresso powder. Add this mixture to the stand mixer. It does not need to be cooled prior to adding.

Alternate adding the flour mix and the buttermilk mix. Always start and end with the dry ingredients. Mix until just combined.

Fill cupcake liners only slightly more than ½ full. Bake at 350 until a toothpick inserted in the center comes out clean. I typically start checking my cupcakes at 17 minutes and my cakes at 35 minutes. Cook times will vary based on your oven and how full you fill your cupcake liners or cake pans.
Allow cakes or cupcakes to cool for 10 minutes prior to removing them from the pan. Cool completely prior to frosting.

This cupcake pairs very well with Vanilla Buttercream Frosting, or make it exciting by reducing the amount of vanilla extract by ½ and adding in ½ Tbsp Peppermint extract. It also pairs well with Chocolate Buttercream Frosting…..there can never be too much chocolate! Sprinkle with peppermint bits or drizzle with melted baking chocolate.......

ENJOY!
Supplies used in creating these cupcakes and cake include:  Measuring spoons, Measuring cups, Bowl set, Stand Mixer, Spatula set, Cake pans, Cake Boards, Cupcake pans, Cupcake liners, Ice Cream scooper, Parchment paper, Cooling racks, Frosting Bags, Tips, Ties and Caps, Cake leveler, Turntable, and Cupcake storage. Click here to be taken to my Amazon Cake and Cupcake Baking Supply List. For page transparency: As an Amazon Associate I earn from qualifying purchases.

See Full Recipe Below:

Comments
Post a Comment